
Your garage is more than just a spot for parking the car or stowing away those once-a-year holiday decorations. It’s a vast expanse of untapped potential, a blank canvas ripe for transformation. Consider the possibilities of converting this underused space into an organized haven for your passions, a fully equipped workshop, or even an additional living area tailored to your needs. You don’t need to be a seasoned DIY guru to make these changes. Our comprehensive guide presents over 35 transformative projects, from straightforward organization tips to full-scale renovations.
Whether your aim is to streamline storage, boost the functionality of your workspace, or construct the ultimate man cave, our suggestions are tailored to enhance every square inch of your garage. Prepare to discover the surprising versatility of this familiar space. So, strap on your toolbelt, ready your hands, and get set to take your garage to impressive new heights!
Pegboard “Book” for DIY Storage
Create a flexible storage solution using a pegboard in a unique “book” format. This project allows for easy access and organization of tools and supplies, mimicking the functionality of turning pages.
Materials Needed:
- 4×8 ft. pegboard sheet
- 1×2 wood pieces
- Two 2x4s, at least 20 inches long
- Hinges
- Screws and drill

Instructions:
- Cut the pegboard sheet into 24×32 inch rectangles.
- Cut 1×2 wood pieces to frame the pegboard sheets.
- Assemble frames using screws and attach them to the pegboard sheets.
- Cut two 2x4s to serve as spines for the pegboard frames.
- Attach the pegboard sheets to the 2×4 spines using hinges, ensuring ample space between each “page.”
Transform Your Garage Drawer into a Socket Drawer for Pliers and Screwdrivers
Turn an ordinary drawer into a neatly organized socket drawer for easy access to your pliers and screwdrivers. This project is ideal for keeping your tools orderly and quickly accessible.
Materials Needed:
- Measuring tape
- Plywood (1/2″ thickness)
- Table saw or circular saw
- Jigsaw or coping saw
- Sandpaper (medium and fine grit)
- Wood glue
- Clamps
- Drill with various sized drill bits
- Socket organizers
- Pliers and screwdrivers
- Paint or varnish (optional)

Instructions:
- Measure the drawer intended for conversion and sketch a layout to position the socket organizers for pliers and screwdrivers.
- Cut the plywood to the drawer’s dimensions using a saw.
- Lay out the tools on the plywood according to your plan and trace their outlines, leaving adequate space between them.
- Use a jigsaw or coping saw to carefully cut out the tool outlines, ensuring each tool fits snugly.
- Smooth the edges using medium-grit followed by fine-grit sandpaper.
- Attach the socket organizers to the plywood using glue or screws, securing them with clamps or screws as needed.
Lawn Tool Organization
Create an efficient storage solution for your lawn tools to keep your garage neat and your tools easily accessible. This project is straightforward and greatly improves the functionality of your garage space.
Materials Needed:
- Hammer
- Nails
- Screws
- Screwdriver
- Stud finder
- Wood boards (2x4s or 1x6s)
- Wall-mounted shelves or pegboards
- Hooks or holders for lawn tools
- Optional: sandpaper, wood glue, and wood filler

Instructions:
- Measure the designated area for the lawn tool organization system to ensure it fits the intended shelves or pegboards.
- Use a stud finder to locate and mark the studs in your garage wall.
- Cut the wood boards to your desired dimensions for shelves or pegboards.
- Assemble the boards using wood glue and nails to form a sturdy shelf or pegboard structure. Allow the glue to dry completely.
- Sand the wood boards until smooth, and fill any gaps or holes with wood filler; sand again once dry.
- Securely mount the shelves or pegboards to the wall, using screws or nails, ensuring they are level. Attach additional brackets if needed for support.
- Install hooks or holders on the shelves or pegboards at a convenient height, spaced appropriately for your tools.
- Organize your lawn tools on the hooks or holders for easy access and efficient storage.
Create Your Own 5-Gallon Water Jug Storage
Organize your garage with a DIY storage system specifically designed for 5-gallon water jugs. This project is an affordable, effective way to reclaim floor space by using simple materials and basic tools. With a few cuts and some assembly, you can create a custom storage rack that not only saves space but also keeps your water jugs easily accessible and neatly organized.
Materials Needed:
- Eight or nine 8′ 2x4s
- Table saw
- Clamps
- Belt sander
- Drill with countersink bit
- Screws

Instructions:
- Cut the 2x4s into 21×15″ pieces for each shelf.
- Use a table saw to cut seven of these pieces in half, creating the side supports.
- Cut the side stiles to a maximum length of 77″ to accommodate the typical garage ceiling height.
- With clamps, pre-drill and countersink each shelf before assembly to ensure stability.
- Use a belt sander to smooth the inside surfaces where the jugs will sit, ensuring each shelf measures approximately 12x12x15 inches internally.
- Secure the assembled shelves to the wall to maximize floor space. Be ready to make adjustments for any jugs with potential leaks to prevent water damage.
DIY Bracket Shelves

Caulk Tube Storage Organizer
Tackle the common annoyance of tangled extension cords with a DIY project that transforms a standard 100-foot extension cord into a portable, wheel-mounted storage solution. This setup not only clears up the mess but also enhances your efficiency and safety in the garage.
Materials Needed:
- Sturdy extension cord, 100 feet or longer
- Set of durable wheels
- Wooden or metal spool
- Robust plug with multiple outlets
- Screws and fastening materials
- Drill

Instructions:
- Attach a set of sturdy wheels to one end of the extension cord to facilitate easy movement around the garage or workspace.
- Fit a robust plug with multiple outlets at the opposite end of the cord to allow simultaneous powering of several tools.
- Coil the extension cord neatly around a wooden or metal spool, ensuring it is secure and evenly distributed.
- Attach the spool to the wheel assembly, ensuring stability and ease of movement.
- Enjoy a clutter-free garage with this mobile extension cord system, ready to roll out whenever you need power, where you need it.
Roll into Convenience: The 100-Foot Extension Cord on Wheels
Tackle the common annoyance of tangled extension cords with a DIY project that transforms a standard 100-foot extension cord into a portable, wheel-mounted storage solution. This setup not only clears up the mess but also enhances your efficiency and safety in the garage.
Materials Needed:
- Sturdy extension cord, 100 feet or longer
- Set of durable wheels
- Wooden or metal spool
- Robust plug with multiple outlets
- Screws and fastening materials
- Drill

Instructions:
- Attach a set of sturdy wheels to one end of the extension cord to facilitate easy movement around the garage or workspace.
- Fit a robust plug with multiple outlets at the opposite end of the cord to allow simultaneous powering of several tools.
- Coil the extension cord neatly around a wooden or metal spool, ensuring it is secure and evenly distributed.
- Attach the spool to the wheel assembly, ensuring stability and ease of movement.
- Enjoy a clutter-free garage with this mobile extension cord system, ready to roll out whenever you need power, where you need it.
From Crates to Cabinet
Transform idle wooden crates into a stylish, functional cabinet with just a few tools. This project is perfect for anyone looking to repurpose materials and add unique storage to their garage.
Materials Needed:
- Wooden crates
- Plywood for the sides, 1 foot long
- Additional wood pieces for bottom and back support
- Drawer slides
- Tools for cutting and assembly

Instructions:
- Cut four vertical pieces from plywood to serve as the cabinet corners. Adjust the length based on the desired number of drawers and their heights.
- Use plywood to construct the sides of the cabinet, ensuring each piece is about one foot long.
- Add extra wood pieces at the bottom and the back for support.
- Install drawer slides on the cabinet frame and attach them to the crates.
- Drill a hole on the upper front side of each crate for easy pulling.
DIY Garage Door Shelves, 2nd option
Maximize your garage’s storage space by adding shelves to the garage door. This innovative solution uses minimal tools and provides a great way to utilize otherwise wasted space.
Materials Needed:
- Wooden boards
- Brackets
- Screws
- Level
- Measuring tape

Instructions:
- Measure and cut the wooden boards to the desired length.
- Secure brackets onto the back of each board, ensuring they are level and evenly spaced.
- Mount the brackets onto the garage door, securing them with screws.
- Repeat the process until the desired number of shelves is achieved.
On these shelves you can store canned goods, pantry items, gardening equipment, sports equipment, toysBins, boxes, and containers for organized storage.
Screw Gun Rack
Tired of your screw guns, drills, and electric shears cluttering up your garage? This DIY Screw Gun Rack is your answer. We crafted this convenient rack from scrap 4″ PVC pipe, each segment cut to 14″ to perfectly fit your tools. Here’s a simple way to organize your space and keep your tools in check.
Materials Needed:
- 4″ PVC pipe
- 2″ hole saw
- Jigsaw
- Drill
- Screws
- Scrap piece of 3/4″ plywood, 2’x4’6″

Instructions:
- Cut the PVC pipe into 14″ lengths to accommodate screw guns.
- Using a 2″ hole saw, drill a hole 3″ in from one end of each pipe section.
- Cut into the drilled hole with a jigsaw to create a notch.
- Drill holes at 90-degree angles to the notches on the pipes, enlarging one set to fit a screwdriver.
- Mount the PVC pipes onto the plywood, arranging them to allow easy access and mobility of the unit.
- Use leftover PVC pipe to create a storage basket for screw tips, drill handles, and other accessories by cutting one end at a 45-degree angle and attaching it to the backside of the board.
The DIY Bike Wheel Hanger
Turn an old bicycle wheel into a functional tool hanger with this DIY Bike Wheel Hanger project. This clever setup not only saves space but also transforms your tools into a piece of art, perfect for any cycling enthusiast looking to enhance their garage.
Materials Needed:
- Old bicycle wheel
- Mounting hardware
- Tools for installation

Instructions:
- Secure the bicycle wheel to your garage wall at a suitable height.
- Use the spaces between the spokes to hang wrenches and other tools, creating an efficient and visually appealing storage solution.
- This setup is ideal for easy access to tools while also keeping them neatly organized and off the floor.
Maximizing Efficiency with a DIY Air Compressor Cart
Enhance the functionality of your air compressor with this custom-built DIY Air Compressor Cart. This project creates a mobile base for your compressor, complete with an attached reel for the air hose, boosting both mobility and organization in your workspace.
Materials Needed:
- Base cart or sturdy platform
- Reel for air hose
- Mounting hardware
- Tools for assembly

Instructions:
- Attach your air compressor to a sturdy mobile base or cart.
- Install a reel on the cart to manage the air hose efficiently.
- Ensure the setup is secure and the hose extends easily for use in various garage projects.
- This mobile solution is especially useful for tasks requiring movement, such as painting or automotive work, making your air compressor more versatile and easy to use.
DIY Wire Garage Shelving

Remember the ceiling
We’ve discussed (literally as well as figuratively) how to use your garage’s floor space and wall space efficiently. But there’s one more surface you should not overlook – the ceiling. You can hang long, flat items, like ladders or seasonal sports equipment, from the garage ceiling. You should ensure that the shelves are not blocking the garage door’s operation and that enough space exists to prevent them from touching your car’s roof.

You might be interested in exploring several options. For example, you can make your own using scrap metal and wood. You can’t go wrong with overhead storage racks; They are the solution for larger and more unusually shaped objects. Hoist-like systems can also store heavier items like ladders and bikes.
Affordable Storage with Truss Shelves
For those seeking a budget-friendly storage solution that also adds a touch of style to their garage, DIY truss shelves are an excellent option. While they may not be the most robust on the market, truss shelves offer a visually appealing and effective way to store lighter items without breaking the bank. This type of shelving is particularly suited for environments where aesthetic value and cost-efficiency are prioritized over heavy-duty functionality.
Materials Needed:
- Braces for top and bottom shelves
- Lumber or wooden beams
- Screws and tools for assembly

Instructions:
- Use braces at the top and bottom shelves for added stability.
- Assemble the frame by leaning ladders against each other before attaching the boards.
- Secure the boards on one side before moving to the other to maintain balance.
- Regularly check and tighten connections to address any wobble in the shelves.
These DIY solutions help maximize every inch of your garage, from floor to ceiling, turning it into a well-organized, efficient workspace.
Milk Crate Garden Stake Organizer
Maximize your garage storage and recycle at the same time with a DIY Milk Crate Garden Stake Organizer. This project utilizes two milk crates to create a simple yet effective vertical organizing system for garden stakes, tools, and even sports equipment.
Materials Needed:
- Two milk crates

Instructions:
- Clean the milk crates thoroughly to remove any dirt or debris.
- Stack the crates one on top of the other, aligning the openings to ensure a seamless fit.
- Organize your garden stakes by size for easier accessibility.
- Insert the stakes through the holes of the top crate, ensuring they extend into the bottom crate for added stability.
- This space-saving solution helps declutter your garage, making selection and storage of stakes or similar items effortless and orderly.
DIY Garage Flooring Upgrade
Transform and enhance your garage floor with easy-to-install interlocking garage floor tiles. This upgrade not only improves the appearance of your garage but also increases its functionality with a durable, easy-to-clean surface.
Materials Needed:
- Interlocking garage floor tiles
- Rubber mallet
- Drill
- Screws
- Saw (for trimming tiles)

Instructions:
- Clear out your garage and thoroughly clean the existing floor to ensure a smooth installation.
- Begin at one corner of the garage and lay the first tile.
- Align and press down on the next tile, tapping it with a rubber mallet to ensure it fits snugly.
- Continue this method across the floor, ensuring each tile securely interlocks with its neighbors.
- Measure and cut tiles as necessary to fit along the garage edges and secure them with screws if needed.
- This straightforward project requires only basic tools and offers a refreshed, stain-resistant garage floor that’s both functional and attractive.
Swiveling Ceiling Fan Platform

Instructions:
- Cut the plywood base to the desired length, ensuring it spans multiple ceiling joists for a stable mount.
- Cut a groove down the center of the base and inset the T-track for adjustable positioning.
- Use a router trammel to cut a circular fan platform and to route adjustment slots for fan angle customization.
- Attach the fan to the circular platform.
- Secure the platform to the T-track using threaded knobs, bolts, and washers, enabling nearly 180° rotation.
- This setup allows you to direct airflow precisely where needed, enhancing comfort during intensive work sessions and optimizing your garage environment.
Hang-it-All Hooks
We have the solution for the perfect substitute for those store-bought hangers that cost a fortune! Most of the time, we waste our money looking for solutions that a more budget-friendly one could easily replace. It is one idea that we would like to use in the future.

The plastic hooks plumbers have been using to support pipes may be repurposed to serve as hangers for nearly all tasks. They are affordable, durable, and available in a variety of sizes to choose from. The plumbing sections of home centers & hardware shops are the places to look for these inexpensive storage solutions.
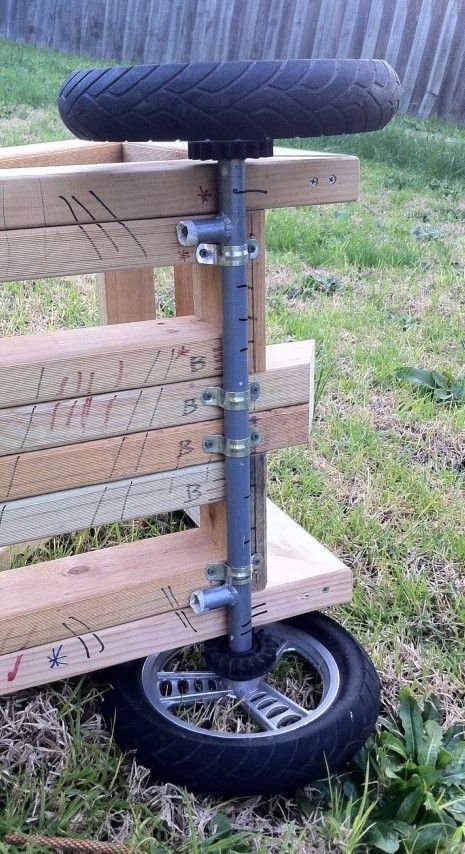
The Scooter Seat
Revive an old scooter by converting it into a unique piece of furniture with this simple DIY project. Start with a sturdy scooter, a piece of plywood for the seat, another for the backrest, and a selection of metal pipes and screws for the frame. First, cut the plywood to fit the scooter’s base for the seat and an appropriate size for the backrest. Remove the scooter’s handle, retaining only the deck, and securely fasten the plywood seat onto it using durable screws.
When Not in Use
Foldable workbenches are very popular, especially for those who love to indulge in some woodworking in their home. A fold-up suspended shelf is a great temporary storage idea. If a new tool or equipment has just arrived, it can take a while to find the perfect space to store it. In the meantime, a fold-up shelf can come in handy.

Use a piece of plywood on the wall to build a surface where the frame can go. Then, attach two 2×4 planks of wood vertically to hold the shelf. A rectangular ladder section or a piece of wood can be used as a shelf. Use hitch pins, screws, and cables to make the shelf mobile. When there is no need for the shelf, it can be folded up to keep it flat against the wall.
DIY Mobile Vice Holder
Transform your garage workspace with this ingenious DIY Mobile Vice Holder. This homemade tool stand is sturdy and versatile and constructed from a cement-filled spare tire and wheel rim. To start, Step 1: Gather Your Materials – You’ll need a spare tire, a wheel rim, rectangular tubing, a steel plate, plywood, concrete, and your toolbox. Step 2: Prepare the Base – Fill the tire with concrete, ensuring the wheel rim is centrally placed and secure. This step provides the necessary weight and stability for your mobile holder.

Step 3: Construct the Stand – Weld the rectangular tubing to the steel plate to create a vertical stand and attach it to the rim. Step 4: Add the Work Platform – Cut the plywood to size and securely mount it atop the vertical stand. This platform will serve as your work area for power and hand tools. Step 5: Install the Vice – Attach the vice to the steel plate, ensuring it’s firmly in place. Congratulations! Your mobile vice holder is now ready to enhance your DIY projects with its portability and functionality.
Quick-Adjust DIY Outfeed Roller
Elevate your woodworking with a DIY adjustable outfeed roller stand anchored to a sturdy sawhorse for unmatched stability. Step 1: Drill Holes – Use a metal-cutting bit to drill large holes in the base and top of a heavy-duty scissors jack.

Step 2: Assemble Stand – Attach a long bracketed roller to the jack, and then bolt the assembly to the sawhorse using nuts, wing-nuts, and washers. Bonus Tip: Speed up height adjustments by using a screw hook in a drill to operate the jack. This compact, robust setup supports various board sizes, enhancing your workshop’s efficiency.
DIY Jack Stand
For building a garage jack stand, Step 1: is to gather materials: two sturdy vertical beams, a solid base plate, a mechanical bottle jack, and four angle brackets. Step 2: Secure the base plate to the vertical beams to establish a ‘U’ shape for a stable base.

Step 3: Position the bottle jack between the beams, aligning it with the ‘U’ top. Step 4: Attach the jack using angle brackets to ensure it’s firmly in place. Step 5: If needed, reinforce with additional supports for stability. Step 6: Perform a safety test with a light load before regular use. This method will yield a reliable jack stand for your garage DIY projects.
Garage Storage
Building garage storage shelves involves a series of measured steps to ensure stability and strength. Starting with a cleat secured to the ceiling, a 2×4 is split down the middle to create two cleats for either side of the garage. Using 3″ decking screws, the wood is then pre-drilled and secured to prevent splitting. The framework for the shelves involves vertical ties connected to the ceiling cleat, glued, and screwed for added strength.

A second 2×4 also ripped down the middle, supporting the front of the shelves, creating a sturdy platform. The heaviest task is positioning the shelf material, such as a hefty 3/4″ sheet of flooring, which is then secured at the front and back to prevent movement. With all components in place, checking for square ensures precision, resulting in a robust storage solution that’s prepared for future use and keeps the workspace uncluttered.
Hose Storage
Storing your garden hose in the garage isn’t a necessity; you can keep it outside in a tidy and protected manner using a storage tub. This method ensures your hose is easily accessible, neatly coiled, and shielded from the elements when not in use.

Placing it in a sturdy tub near the tap minimizes the hassle of dragging it out from the garage, and it can blend seamlessly with your outdoor decor. This storage solution is both practical and aesthetically pleasing, keeping your hose ready for use whenever you need it.
Dual Shop Vacuum
Streamline your garage workshop with this ingenious dual-shop vacuum system featuring a central cyclone dust separator. The additional Y-piece attachment on the cyclone inlet enables connections to multiple tools, facilitating concurrent usage and efficient dust management.

This custom setup is a testament to the savvy DIYer’s drive for a clean, organized, and highly functional workspace. It’s an ideal arrangement for handling the demands of various projects while ensuring that cleanliness and order are maintained in a bustling garage environment.
Drill Bit Lazy Susan
Create an organized and efficient workspace with a custom lazy Susan drill bit holder, ensuring that each drill bit size has a dedicated spot. To make this handy organizer, you’ll need a lazy Susan base, a wooden or plastic panel, and drill holders or clips. Step 1: Secure the lazy Susan mechanism to your workbench or shelf.

Step 2: Attach the panel atop the lazy Susan. Step 3: Install the drill holders or clips, grouping them by size for easy identification. Step 4: Place each drill bit in its respective holder. This rotating drill bit station saves time, keeps your work area tidy, and provides quick access to the tools you need, making your DIY projects more enjoyable and efficient.
DIY Garage Door Motor Check
Keep your garage door running smoothly with this simple DIY check-up. Start with a visual inspection for signs of wear or damage to the motor and connections. Operate the door, listening for unusual noises like grinding or whirring, which could indicate motor issues.

Test the door’s balance by manually lifting it halfway after disconnecting the motor; it should stay in place, or else springs or tracks might need attention. Verify the auto-reverse feature with an obstruction test. Check both the remote control and wall switch for consistent operation, and regularly lubricate moving parts. If problems persist, consult a professional for a thorough assessment.
Cords and Hose Organization Ideas
We are already familiar with the issue that would arise if we hang all of the wires on a single hook: We will need to unhook several cords to access the specific cord we require. We could have individual hooks for each cable, but this would take up too much valuable wall space in the store. The cord rack seems to be the ideal answer to the problem. It allows anyone to immediately grasp any cable without digging for it while stacking the cords to make the most optimal use of space.

This project, which takes an hour, offers a simple method for hanging a range of items, like extension cables, rope, and air hoses, so they are out of the workstation. A simple cable rack prevents the cords from tangling and makes them easier to reach.
DIY Efficient Spray Can Rack
Transform your garage’s organization with a homemade wall-mounted spray can holder. To start, you’ll need a wooden board—length varies based on the number of cans you want to store—a drill, and a hole saw attachment sized to the diameter of your spray cans. First, measure and mark the layout for your cans on the wooden board, ensuring even spacing.

Use the hole saw to drill out circular holders for each can. Once all holes are made, sand any rough edges for a clean finish. Mount the board on the garage wall, anchoring securely into studs. Slide in your spray cans for a neat, easy-to-access display. This practical DIY project not only saves space but also turns your spray can collection into an organized work of art.
DIY Cyclone Dust Collector
Craft your own efficient cyclone dust collector for the garage using a few simple materials. Start with a robust water jug, a vacuum cleaner with a hose attachment, and a wooden or PVC connector. Cut the jug’s cap to fit the vacuum hose snugly, ensuring an airtight seal.

Secure the hose to the jug cap and create an inlet for dust-laden air using another piece of hose attached to the jug’s side. This system uses centrifugal force to separate dust particles from the air, depositing them in the jug while clean air passes through the vacuum. It’s an affordable and effective solution to keep your garage air clean and dust-free.
DIY Extension Cord Holder
Dealing with tangled and damaged extension cords can be a real hassle. This DIY project will help you organize your cords and fix any damage to the plugs. You will need the following materials: 3/4″ X 6″ X 22″ piece of wood such as Cedar or Pine. 3/4″ X 1 3/4″ X 6″ piece of wood such as Cedar or Pine. 2″ X 4″ 2 2″ Deck Screws, Electrical Plug Box and Plug, Oversize plug cover with individual door covers, Cable Clamp for the plug box, 12″ Rope. The steps: 1. Start by cutting a 3/4″ piece of wood 6″ X 22″ and rounding the corners if desired;

2. Next, mount an electrical box in the center of the board 4″ down from the top; 3. Cut a 3/4″ piece of wood 1 3/4″ X 6″ and drill a clearance hole for the screw you’ll use to attach it about 1 3/4″ from one end. Round the opposite end of this piece; 4. Cut a piece of 2″ X 4″, 1 3/4″ long and mount it 4″ up from the bottom of the board using two 2″ deck screws; 5. Screw the small piece of wood onto the top of the 2″ X 4″ using a screw and flat washer. This piece should be able to rotate for easy cord removal; 6. Wire your old extension cord to the plug box through a cable clamp and mount the cover on the plug box; 7. Finally, attach a small piece of rope to the back of the board for a handle using heavy-duty staples.
DIY Garage Storage Tubes
Craft a practical and efficient storage solution for your garage with this DIY PVC pipe organizer. Begin by acquiring PVC pipes, preferably with a wide diameter, to accommodate various items. Cut the pipes into equal lengths, ensuring they fit the height or width of the wooden frame you’ll construct. Sand the edges for a smooth finish and a professional look. Next, build a simple wooden frame using sturdy lumber; the size will depend on your available space and storage needs. Secure the PVC pipes horizontally, allowing for a slight tilt to prevent items from sliding out.

Building a Water Bucket Dust Collector
To create a simple water bucket dust collector, begin by sourcing a sturdy 5-gallon bucket and a tight-fitting lid. Step 1: Secure two pieces of PVC pipe; one will serve as the air inlet and the other as the outlet. Step 2: Drill a hole near the bottom of the bucket and insert the inlet pipe, sealing it to prevent leaks. Step 3: Drill a second hole at the top for the outlet pipe, attaching an elbow to deter water from escaping.

DIY Garage Storage Wall
The cost of a sound garage storage system could be pretty high. The cost of shelves, tool racks, unique hooks, & other knickknacks may quickly mount up. This home-built solution offers the same flexibility as commercial alternatives without the hefty price tag. We could cover 16 feet of wall with this approach at a relatively low cost of a few hundred dollars for the supplies. Using leftover plywood & other inexpensive building supplies can reduce the price even more. It included Shelf brackets, Vinyl gutter storage bins, Long-handled tool storage, a Wheelbarrow storage hub, a Kid-friendly ball corral, Hose and sprinkler bucket, and a Sports gear rack.

Even a do-it-yourselfer can put this system together in a single weekend because of how easy and quick it is to put together. Home improvement shops and hardware stores have most of what we’ll need. And one can adjust it to fit their garage and equipment precisely by simply driving in a few screws to reposition or add components.
Craft an Ingenious Jack and Jack-Stand Holder
Are you tired of constantly tripping over your jack stands? Let’s dive into an exciting DIY project and eliminate this common garage annoyance once and for all. Materials needed: A wooden board or sturdy plywood, mounting hooks, screws, a 2-inch PVC coupler, and a 2-inch PVC cap. Step 1: Start by measuring and cutting your wooden board or plywood to create the base of your storage rack; Step 2: Depending on the number of jack stands you have, drill appropriate holes in the board to fit the top of your jack stands. This way, they can be securely stored upside down.

Step 3: Install mounting hooks on the underside of the board. These hooks will be a handy hanging spot for your lightweight floor jack; Step 4: For the handle storage, screw a 2-inch PVC coupler onto the side of your new rack. Secure a 2-inch PVC cap on the wall near the floor; this will hold the other end of the handle, keeping it off the ground; Step 5: Finally, secure your newly crafted rack to a wall in your garage using sturdy screws.
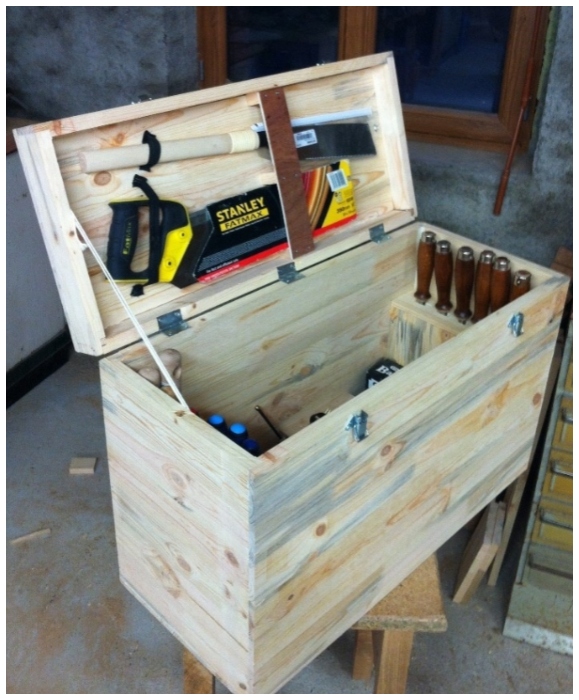
Rustic Wooden Tool Chest
Craft a rustic wooden tool chest to organize and protect your tools, combining functionality with a classic aesthetic. You’ll need planks of pine or cedar, wood screws, hinges, a saw, a drill, sandpaper, and a varnish or sealant for protection. Begin by measuring and cutting your wood to create a box frame, a base, side panels, and a lid. Assemble the frame using screws and ensure it’s square.
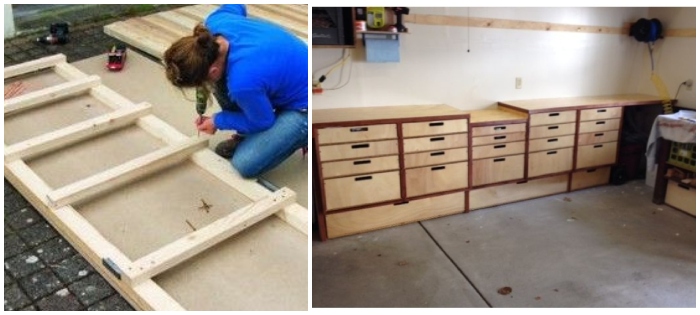
Keep Your Tools In Reach
Abandon the old, impractical ways of scattering tools on a Fender pad. Embrace the satisfaction of building a personalized, practical, and portable solution for your tools. Follow along with our guide to creating your very own wooden rolling cart. Materials needed: plywood, hardwood strips, 4 caster wheels, screws, nails, a handle, and paint or varnish (optional). Step 1: Start by measuring and cutting the plywood to the size you need for your rolling cart’s top, bottom, and sides; Step 2: For reinforcement, attach hardwood strips along the corners of your cart using screws.

Step 3: Attach the plywood pieces together, ensuring that the screws are tightened firmly for stability. Remember, your rolling cart will carry the weight of your tools. Step 4: Fix the caster wheels at each corner of the cart’s bottom. Ensure the wheels are sturdy enough to hold the weight and allow easy mobility; Step 5: Install a sturdy handle on one side of the cart to enhance maneuverability; Step 6: Sand the surfaces of the cart and apply paint or varnish if you wish. This makes your cart aesthetically pleasing and helps protect the wood.
Revolutionize Your Gate: A Thrilling DIY Guide to Installing Barrette Gate Wheel
Gather these tools and materials: Barrette Outdoor Living Heavy 3-3/16-in Black Gate Wheel; Drill with an appropriate drill bit; Screwdriver; Adjustable wrench; Tape measure; Marker; Level. Steps: Examine your gate to ensure it’s in good condition and compatible with the Barrette Outdoor Living Heavy Gate Wheel. Ensure there’s enough clearance beneath the gate for smooth movement; Using a tape measure, find the desired position for the wheel on the gate’s bottom edge. Mark the spot with a marker, ensuring it’s centered and level.

Equip your drill with the appropriate bit and carefully pre-drill holes at the marked spots on the gate; Unpack your Barrette Outdoor Living Heavy Gate Wheel and follow the manufacturer’s assembly instructions; Align the wheel’s mounting bracket with the pre-drilled holes on the gate. Secure the bracket using the provided screws and a screwdriver; Using an adjustable wrench, tighten or loosen the wheel’s nut to achieve the desired clearance between the wheel and the ground. This ensures smooth, effortless gliding. And that’s it! You’ve successfully installed the Barrette Outdoor Living Heavy 3-3/16-in Black Gate Wheel.
Two-in-One
Garage walls often have shelves or hooks to mount things. While it is a good idea to use the wall space, it can be better. Pick one wall of the garage that does not have any shelves in the lower regions. Use plywood sheets to make a cabinet frame. The height of the frame should be similar to a table so the cabinet tops can also be used as a workbench.
After the outer area is done, make drawer space and build the drawers out of plywood. The size and shape of the drawers depend on the tools one needs to store. It is okay to seek help from a handyman or woodworker to ensure all goes well. Once the drawers are inserted, sand the cabinet tops and coat every surface with polyurethane.
Custom Tool Wall
A custom tool wall is a great way to organize your garage and keep your tools easily accessible. It’s a simple DIY project that can be done on the weekend and will significantly impact your garage’s functionality. Here’s a step-by-step guide on how to create your own custom tool wall:
1. Start by measuring the wall space you want to use for your tool wall. You’ll want to ensure you have enough room for all your tools and any future additions.
2. Once you have your measurements, create a layout for your tool wall. This can be done with a pencil and paper or using design software. Be sure to consider the size and shape of your tools and how often you use them.

3. Purchase the materials you’ll need, such as plywood, screws, and a power drill. You’ll also need to decide on a type of pegboard or Slatwall. Choosing a high-quality material that can withstand the weight of your tools is essential.
4. Cut the plywood to fit your wall space and attach it to the wall using the screws and power drill. You may want to use a stud finder to locate the wall studs for added support.
5. Install the pegboard or Slatwall onto the plywood. Be sure to level it and attach it securely.
6. Add your tools to the wall using hooks, hangers, and other storage accessories. You can also use labels or markers to help you remember where each tool belongs.
7. To finish, you can paint the wall or even add custom graphics to make it look more personalized.
Hooks for Cords and Hoses
It is possible to harm the sheathing & wires of electrical cables and hoses by kinking them when they are hung on tiny hooks or nails. For simple and affordable hangers, cut lengths of ABS plastic plumbing tubing to a size of three inches. To attach end caps measuring 3 inches to a 2 by 6, use two screws measuring 1-5/8 inches.

To prevent the screw heads from ripping through the plastic, place fender washers beneath them. After that, put cement on lengths of close pipe 8 inches long. These “hooks” have a great deal of tenacity. One may also create a garden hose storage system that is aesthetically pleasing.
Cabinet for Secure Storage in the Garage
Particularly in the workshop and the garage, children have easy access to a wide variety of potentially harmful materials and instruments located around the house. We now have a secure location to keep potentially dangerous items, such as chemicals, pest control products, paint, sharp tools, and more, thanks to this storage cabinet’s locked door.

It is also possible to paint or stain this cabinet, which might be used in the home as an additional pantry, a closet for cleaning supplies, or perhaps a center for hobby supplies. It could be used as an all-purpose as well.
The Many Uses of PVC
People who are fond of gardening have some extra tools to care for. They need to clear space in the garage for their gardening tools. It can look quite cluttered unless the gardening tools are not organized neatly. Implement this simple yet effective storage idea for organizing gardening tools.

Take PVC pipes and cut them into 12 inches long sections. Sand the edges so no one would get scratched while reaching for a tool from the holder. Drill holes into the PVC holders so they can be screwed onto a wooden beam or log. Make sure the PVC holders have some space in between so the garden tools are easy to grab.
DIY Storage with Cans
After eating the canned food items, do not throw away the cans in the trash. Keep in mind that they might come in handy later. This storage space is ideal to build near the workbench so anyone can reach for the tools easily. Take a piece of wide and long plywood and screw it to the wall. If there is a pegboard nearby, even better. Attach the plywood to the pegboard.

Use a can-opener to tweak the top and bottom of the cans as needed. The cans can be used as a holder or organizer with the top and bottom parts off. Take some nails and a hammer to attach the cans to the plywood. Or put some hooks into the plywood, drill holes into the cans and mount them on the hooks.
Keep the Poles Away
Take two identical pieces of rectangle-sized wood. After every three inches, put a mark on both pieces. Put a distinct mark (i.e., a plus + sign) in the middle of both pieces to determine where to place the hole saw. Cut holes in the marked places on the wood pieces.

Sand the edges before mounting on the ceiling. Make sure the pieces are mounted proportionally to each other. If the mounting is for storing fishing rods, then make sure the smallest fishing rod can fit into both holes of the wood pieces.
Adjustable Hangers
Adjustable storage ideas are often great since they offer more functionality. This adjustable hanging idea is easy and affordable. Make cleats out of long wood to mount on the wall. If there are any pre-made cleats to use, even better! Use a level to align the cleat with decking screws.

Make hangers out of wood to put on the mounting cleat. The hangers can be of different sizes depending on the stuff one wants to hang. Add hooks to one side of the hangers. Make sure to use mounting blocks for where the hooks will go. If the mounting block is wide enough, more than one hook can be attached to one hanger.
From File Cabinet to Garage Storage
If there is any old file cabinet lying around, it can be used to fashion a storage space for the garage. Take out the drawers from the cabinet and take care of any rust that might be showing. It is the perfect time to get creative. Get some paints and brushes to make the cabinet colorful.

Place the file cabinet beside a wall with the open drawer space facing up. Large and long tools can be placed in the drawer spaces. Since there are several drawer holes, the tools can be organized according to their usage.
Pallet Dart Board
Working can be fun, and so can the workplace. Pallets are often used for storage spaces. They can also be used in a different, but fun way. Dartboards are a fun game, but there is a risk of damaging the wall if someone misses a few throws.

Take a pallet where a dartboard can be placed with plenty of space all around. Attach a rectangular piece of wood at the bottom like a shelf. The darts can be placed there, and it adds a nice design element to the entire pallet board for throwing darts. The pallet can be placed on any wall to shoot some darts between work or in social gatherings.
Power Tools Storage with Charging Station
Power tools are quite handy, but storing them properly can be hassling because of all the cords. Use plywood sheets to make shelves, dividers, bottom pieces, and drawers. The drawer is optional, but it is great for power tools storage.

Screw all the pieces together. Use wood glue if needed. Sand all the exposed surfaces to avoid chafing. Mount the storage unit to the wall. Make sure there is a power outlet nearby the mounting place since it is also a charging station. Add a surge protector if possible
A Little Corner
A paint booth can be an excellent addition to the garage. It would provide a secure place to paint or do other work that can make the garage messy. It is best to make a paint booth around the workstation if there is no extra space.

Measure the area where the paint booth would be and cut out poles to make a frame of the booth. Use T-connectors and elbow connectors to attach the poles. Measure plastic sheets according to the pole frame and trim. Drape the sheets around the frame and attach them with clips or tapes. The opening of two sheets at the front should be left as it is since they would work as the door.
Battery Dispenser
Batteries are handy not just for big power tools, but for small ones as well. Use plywood and wood to make boards for the dispenser. Each compartment for the batteries should be different sizes since batteries come in different sizes as well (i.e., AA, AAA, C, D, etc.).

Cut angular shapes at the bottom for the side wood pieces. The angular holes would make it easier to pull out the batteries. Then put all the pieces together using screws and wood glue. Take a clear acrylic sheet and attach it to the front of the dispenser with four screws on the corners. Make sure there is enough space at the bottom right under the acrylic sheet to pull out batteries.
DIY Rack for the Ceiling of the Garage
Put somewhat heavy items as well as those that are light on shelves hanging from the ceiling. The clearance needed to accommodate a shelf and typical 12-1/2 in. high plastic bins is 16 in. These wooden overhead garage storage racks are intended to fit into that vacant area above the garage doors.

Nevertheless, the shelf height is adjustable, and one may arrange them anywhere. The weight would be the only restriction there is. This shelf is 4 feet by 6 feet and was built to hold approximately 160 pounds, the maximum weight a standard ceiling structure can securely sustain.
Cleaning Tower
Cleaning supplies often take up a lot of space in the garage. Instead of looking for high shelves to stack up stuff, use a small corner of the garage effectively with this storage idea. Make a frame and put together a few shelves horizontally. Use plywood, brackets, and connectors to put the entire thing together.

Make sure there are shelf supports on each of the shelves to strengthen the structure. Keep some vertical space on one side of the tower for all the brooms and mops. Attach a frame on one side for inserting hooks or use holders to keep the cleaning tools upright.
Rack for Wheelbarrows
To make more room on the floor, mount the wheelbarrow on the garage wall. Place a 1×4 2 feet long in the middle of two studs 2 feet above the ground. Put it into position using tacks, and then drill pilot holes for three-inch screws through the steel mending plates and the 1×4 before inserting them into the studs. Keep approximately three-quarters of an inch of the plate hanging over the one-quarter to grab the rim.

Mark the studs at 1 in. well above the wheelbarrow bucket by placing the wheelbarrow on the 14. Install ceiling hooks by making pilot holes & then screwing them into the studs. If we twist the hooks, they’ll grab on the wheelbarrow’s lip and keep it from rolling away.
A Workbench That Can Fold Up
When it comes to workstations that don’t take much room, this simple, foldable workstation might be just what we are looking for. Even beginners should be able to put up this workbench because it is easy to put it together. A saw & drill are the only pieces of equipment required. All of the wood is cheap and comes in standard sizes; one can likely find a plywood countertop and pegboard in the correct dimensions at a hardware store.

One can have the timber chopped to a more workable length at the lumberyard so that it would fit in the automobile. Even better, they may slice it all precisely to the size one needs. If one doesn’t have any of the necessary wood scraps lying around the workshop, the total cost is expected to be roughly $100. And it might take around three to four hours to get it done.
Pegboard Wall
A do-it-yourself pegboard system is the most crucial piece of storage equipment for any garage. It makes it simple to access the tools we use most often. To keep the workbench/gardening bench free of clutter, attach a bin towards the bottom of the pegboard to gather all those miscellaneous items that don’t go anywhere else. The pegboard can be mounted on the wall of a garage or workshop in about two hours, creating flexible, inconspicuous shelving.

Construct a framework using 2x2s with central support and link all pieces with a 3-inch drywall screw. And then, we attached a sheet of pegboard that measured a scant 1/4 inch to the framework. The bigger hooks are needed for 1/4-in. More heaviness and will not fall out as quickly as those for 1/8-in. The pegboard is available in white at several hardware stores and home improvement warehouses.
Make it Stick
Take a long piece of log or plywood. Make a horizontal groove in the middle with enough space for the magnets to go. Put earth magnets in the groove and use glue to attach them in place. Leave at least two inches of space between each magnet. It is better to put small pieces of cardboard in the space between each magnet. Since the earth magnets are so strong, the cardboard should provide some protection.

Sand the sides of the groove to make it smoother. Mount the piece of log on the wall. Make sure the log is at an ideal height so people can reach for the tools they need without having to lean up or crouch down.
Folding Mobile Workbench
A mobile workbench with a sizable work area that folds up to only 7 inches thick is a great addition to any home workshop. You can build this workbench with the right materials and tools for about $100. Here are the steps to building your own. Materials required: 1-3/4 inch construction screws, 1×4 pine, 2×4 pine (30 feet), 3-inch construction screws, 3-inch locking swivel casters (4), 3-inch butt hinges (8), 4×8 sheet of 3/4 inch plywood, 5-inch strap hinges (4), Hook-and-eye latches (2), Wood glue. Steps:

1. Fasten the frame rails to the frame stiles with glue and screws.
2. Attach the fixed supports to the interior face of the stiles.
3. Rip the 1×3 to 2 inches wide and crosscut to the length specified in the cutting list.
4. Cut 1-inch deep by 3-1/3 inch wide notch at both ends of the 2-inch wide boards to create the mounting strips.
5. Glue and screw the mounting strips to the inside face of the frame stiles.
6. Set a 2×4 under the ends of the folding support arms for alignment and attach the folding support arms to the mounting strips using butt hinges and screws. The support arms should fold flat against the frame rails.
7. Repeat the process with the folding support panels, using a 3/4-inch plywood scrap against the support arms for alignment.
8. Clamp the unfolded support parts together and position the strap hinges on the connecting pieces, holding them in place with tape while screwing them on.
9. Screw in the hook-and-eye latches to the outer faces of the frame stiles.
10. Screw the top rails to the bench top 5 inches from the ends of the bench top.
11. With the bench folded, screw the casters to the frame rails, offsetting them so they don’t bump into each other when they swivel.
Rotating corner shelves
These shelves make the most of a confined space in the garage. They’re supported by a pair of lazy susans, one at the base and one above the unit (under its top shelf). The top shelf is securely fastened to the wall so it won’t topple over.

It has an upper shelf fixed to the wall for the bin to spin freely without toppling over. One can add as many shelves as one likes. As a special provision for long items like levels & straightedges, we left one compartment open from top to bottom. Simple butt joints & screws are all that is needed for construction; no fancy joints or fasteners are required.
The floor should be as durable as possible
The concrete will look even worse after you have cleaned it up. Here is the place to add some finishing touches to your hard work. Antiskid floors can repel oil stains, wipe clean like a kitchen tabletop, and hide any imperfections with color chips or paint. Brilliant!

You have many options, but it’s hard to go wrong with an all-in-one kit like Rust Oleum’s Garage Floor Polycuramine concrete coating. You won’t have to spend much on this kit, but it will be worth the wait. Careful preparation is key to success, especially a dry, clean slab. It will be a worthwhile investment of your time.
Security is important
You will likely want to keep your most valuable gear and tools in your garage if you decide to improve your garage. All that stuff could be a real treasure trove for criminals. You might consider increasing the security of your garage. As with any castle, the defenses are only as strong as their weakest parts. This will usually mean that the door must be lockable and shutable.

Break-ins can be common if the garage door is open and the door to the house is not locked. Use a deadbolt at the garage entrance to prevent break-ins. Install a garage door lock that locks the door to the sidewalls. This will increase security and be used when you are away. No matter what lock you choose, close the garage door when you are done with your chores. You can invest in more advanced systems like smart security cameras and CCTV. You can buy a decent, internet-connected combination floodlight/security camera.
Car damage-proof garage
Once you have cleaned out your garage, you can plan to continue using it for storage or work on your car. You’ll need to consider the size of your garage and the door to ensure your car can be repositioned safely. First, you should not rely on your car’s maneuvering sensors. They will most likely inform you that the space is too narrow. You can use visual aids to help park if you have limited space.

Instead of using motion sensors to tell you how far the car should be drawn, hang a tennis ball from the ceiling on a thread. This, and any other visual aids, should be placed so that there is enough room for you to walk between your car’s rear and the garage’s back wall. Attach scrap carpeting to garage walls to stop your car from coming into contact with them. This will protect your vehicle’s finish. You should allow enough space between two cars to make it possible to move large items around and wheel trash bins safely. You can easily access your minivan and other vehicles with sliding doors by placing them in the garage.
DIY Wall Brackets Out of Scrap Wood
Wooden garage shelves are an excellent method to keep the lawn chairs & folding chairs out of the way and out of sight in the garage. Create some simple, low-cost, wall-mounted brackets that serve a purpose by using two pieces of 1×4 timber (but any scrap lumber would do). Each board should have a length of 7-3/4 inches and an angle of 30 degrees cut into both ends.

If we attach these brackets as pairs, immediately across from one another to the side of the exterior wall studs using three screws measuring two inches in length, we will have the ideal spot to hang our chairs.
Stackable Waste Disposal Tower
This recycled storage rack can be assembled in an hour with only five plastic bins, six 2x2s, & screws. We recommend a top size of 14-1/2 by 10 inches and a height of 15 inches for containers that will fit within our frame. The spacing between the uprights should be modified for usage with containers of varying sizes, allowing the 2x2s to rest on the containers’ rims. Then, with a level, ensure the container fits snugly by adjusting the distance between the horizontal rungs.

Now cut 2x2s to length as shown—Mark the uprights’ rungs. Then drill two 5/32-inch holes in each upright crosspiece. Drill from outside to inside and slant the holes slightly inward to minimize screw breakage. The rungs should be attached to the uprights using 2-1/2-inch screws. Build the front and rear frames and put them together. Following that, join them to the diagonal members on each side.
Garden Equipment Organizer
Construct a simple hanger for long-handled tools out of a pair of 1x4s. For the first one, we will need to drill a set of holes measuring 2 inches along the board’s edge. The challenge here is to place each hole around 1 inch from the edge precisely. It creates a gap at the front that is 1.5 inches wide and allows us to thread the grips through it.

Adjust the distance between the holes so they can accept whatever we will hang from there. To prevent it from drooping, attach that board with screws to another 1×4 cut to serve as the back while adding brackets at a 45-degree angle. Hammer nails into the horizontal board so more items may be hung from it if one wants. Now no more stumbling over garden equipment for us!
Lattice Rack
Plastic lattice is an excellent choice for storing long lengths of piping, flashing, trim, and conduit of varying sizes. Building some garage shelves out of wood is a simple and inexpensive do-it-yourself project for extra storage in the garage.

Cut parts that match, and then nail 2×4 cleats to the ceiling. Finally, connect the lattice to the wall studs and the cleats. Instead of going to the hardware shop to purchase yet another costly item, we can use this idea. Now, we won’t need to hunt for those leftovers since we can find them quickly.
Prevent Trip Hazards by Removing Ladders
Keeping ladders around could invite trip hazards now and then. So it’s better to keep ladders stored differently. Ladders may be easily stored if hung from the ceiling rather than taking up valuable floor space. This carriage has rollers that make it simple to slide in first one of the ladder’s ends and then the other. All the components are available at low costs at different stores, and anyone can avail of them quickly.

Using lag screws of a length of two inches, secure the corner bracing to the ceiling joists. An elastic band should be used to secure its ladder to prevent it from rolling away and falling.
Old Hose Tool Holders
A long tube made of plastic or rubber used to transport liquid from one location to another is known as a hose. One may water their yard with a hose, or they can use it to transfer gas from the pump to the tank of their vehicle. We all are familiar with it. However, we might not know that it can also be used to make an excellent tool holder.

To construct useful holders for handled tools in the garage, cut an old hose into sections measuring 7 inches, slice the pieces, and then attach them to the wall. This simple DIY saves a lot of money.
Double-Duty Garage Storage Shelf
Because there is often a scarcity of floor space in garages, the ideal area to locate storage space with garage shelves is typically found above the garage door. Making one’s own shelves for the garage is a simple DIY project; if one wants twice as much storage space, they can build shelves with two levels.

This DIY project has a base shelf just 5 inches deep, a top shelf 16 inches in depth, and plenty of room for hooks. For shelves of varying sizes or extra breathing room in between them, this fundamental design lends itself well to simple alterations.
Garden/Garage Tool Caddy
We were in the process of constructing a fence, and after we had been through it, we had some spare wood and plastic lattice. Instead of throwing away the leftovers, we came up with the idea to utilize them to construct a caddy that we could use to store and arrange the brooms, shovels, as well as hoes that we use in our garden.

We equipped it with wheels, and now it can be maneuvered into any one of the nooks and crannies in our garage with ease. It is working well! It has made it easier for us to store our equipment once we are finished working with it.
Storage for Fishing Rods Constructed Out of Pool Noodles
Keeping fishing poles in any orderly fashion may be challenging. However, we have found a clever way to organize and store those fishing rods without hassle! Try out this do-it-yourself storage solution for the garage that involves a pool noodle and some PVC tubing if it tends to get tangled up.

It maintains a tidy arrangement of the fishing rods and ensures they are prepared for use. This slim project is the ideal storage solution for homes with garages that are on a much more petite side.
DIY Tape Dispenser
Taking and cutting off duct tape is often a hassle. Unless the tab is folded after every use, finding the duct tape edge is like looking under an invisibility cloak! A duct tape dispenser is a handy tool that can save time and keep the frustration of locating the duct tape tab away.

Use plywood to make a box with little compartments where the tapes can be kept. The compartments can vary in size for different-sized tapes. A filler block or a cylinder-shaped block can be used to put inside the tape rolls. Then finally, place a hacksaw blade at the edge of the tape holder to help cut the tapes.
Arrange the Screwdrivers
Screwdrivers are very handy tools. When there are different shapes and sizes of screwdrivers in the house, it can seem cluttered. Use a simple rack layout to neatly arrange the screwdrivers. A table log can be used to design a screwdriver rack right at home.

Arrange the screwdrivers and mark the spaces where each will stand on the rack. Then use a drill machine to make holes big enough for the screwdriver heads to go through. Mount the rack on the wall on hooks, or use an L-bracket.
Folding Workbench With Storage
This workbench is designed to handle heavy use and features a rack for keeping tools within reach and off the benchtop. A wall shelf above the bench provides additional storage for supplies and small tools. All of these components are made from affordable construction lumber, making it a budget-friendly option.

Unlike many other fold-down tables, this design does not have built-in legs at the front that swing down. This allows for a more spacious feel and easier access to the floor when the table is folded down. Removing the legs also makes it easier to sweep up sawdust and debris from the floor.
Make Use of the Unused Space
A garage or a shed often has some unused space without the residents even realizing it. People are scratching their heads trying to find floor space or wall space to store their stuff. All they need to do is tilt their head upwards and look for the extra space just below the ceilings.

A lot of garages or sheds do not have high shelves, so the space on the upper corners of the room is all wasted. But it can be rectified once that space is discovered. Use some plywood to make some simple shelves on the upper corners of the walls. Make sure there is enough space between the ceiling and the shelves so boxes, tools, and other things can be stored there.
Clear your garage floor
Although it may seem obvious, the best way to increase garage space is to clear as much of the garage floor as possible. This will allow more space for your car and save the hassle of sorting through a mess. You can buy shelves, wall mounts, and racks, or you could consider buying cabinets. You should ensure that your products are supported on legs to clean the floor underneath them. You might prefer open shelves to cabinets for most items if you go the shelving route (except for chemicals and dangerous substances).

Shelves are cheaper and more accessible (you don’t need additional clearance to open the doors) and allow you to scan what you have stored quickly. Cabinets with doors can be chaotic because they allow you to hide ‘evidence,’ and they can soon become cluttered. They are only used when stored items must be protected from dirt and dust in the air.
Maximize the space between your walls
As with point 1, many other products can be used to extend the use of garage walls beyond cabinets and shelves. A pegboard can be installed in your garage. They are easy to find and can be cut to your specifications. You can even paint the design to make it more unique. You can also add many useful hooks, shelves, and other organizers from various manufacturers to this type of solution. Pegboards have some downsides: they aren’t strong enough for heavier items like bicycles, but they can hold small tools and other objects. You can’t go wrong if you want one of these.

Track systems are another option. This allows standard shelves to be suspended from one track attached to the wall studs. They can then support larger objects. You also have many options for hooks, rails, and other accessories. It is important to make sure that the track is level so that shelves or other items you place on it are also straight and level. These are ideal for garage walls that have been finished and plumb.
Make sure you have a workbench
You don’t have to keep your garage empty. If you want, you can make it a workspace. Installing a decent workbench for DIYers is always a smart investment. The wall-mounted, foldable variant, such as a folding table, provides a sturdy surface that can be folded down when it is not in use. This makes it great for DIYers.

Built-in tool storage benches can be more expensive for heavy-duty options. To organize your supplies, you can instead build shelves on either side of a small worktable and hang a board above it. A set of casters can transform any table into a mobile workspace. However, they must not make the table too tall. No matter which option you choose, make sure to find somewhere to sit. You can finish it with a stool that fits under your table and provides storage.
DIY Homemade Garage Storage Out of Pallets
Finding storage space for yard and garden equipment with long handles might be challenging. This clever hack for organizing requires nothing more than a pallet, a few screws, and a drill to complete. In addition, if one does not already have any pallets, it is simple to get one for no cost. One can do this task in only one hour, and once done, all the tools will be neatly arranged and easy to access. It’s a simple and inexpensive do-it-yourself garage storage option.

We secured the pallet to the wall studs by drilling two holes. The pallet isn’t that heavy, so we won’t need many screws/nails to ensure it. Putting away our gardening equipment just became much more manageable and (maybe even) more accessible.